GitHub Workflow
Pull request workflow used in Vitess
If you are new to Git and GitHub, we recommend to read this page. Otherwise, you may skip it.
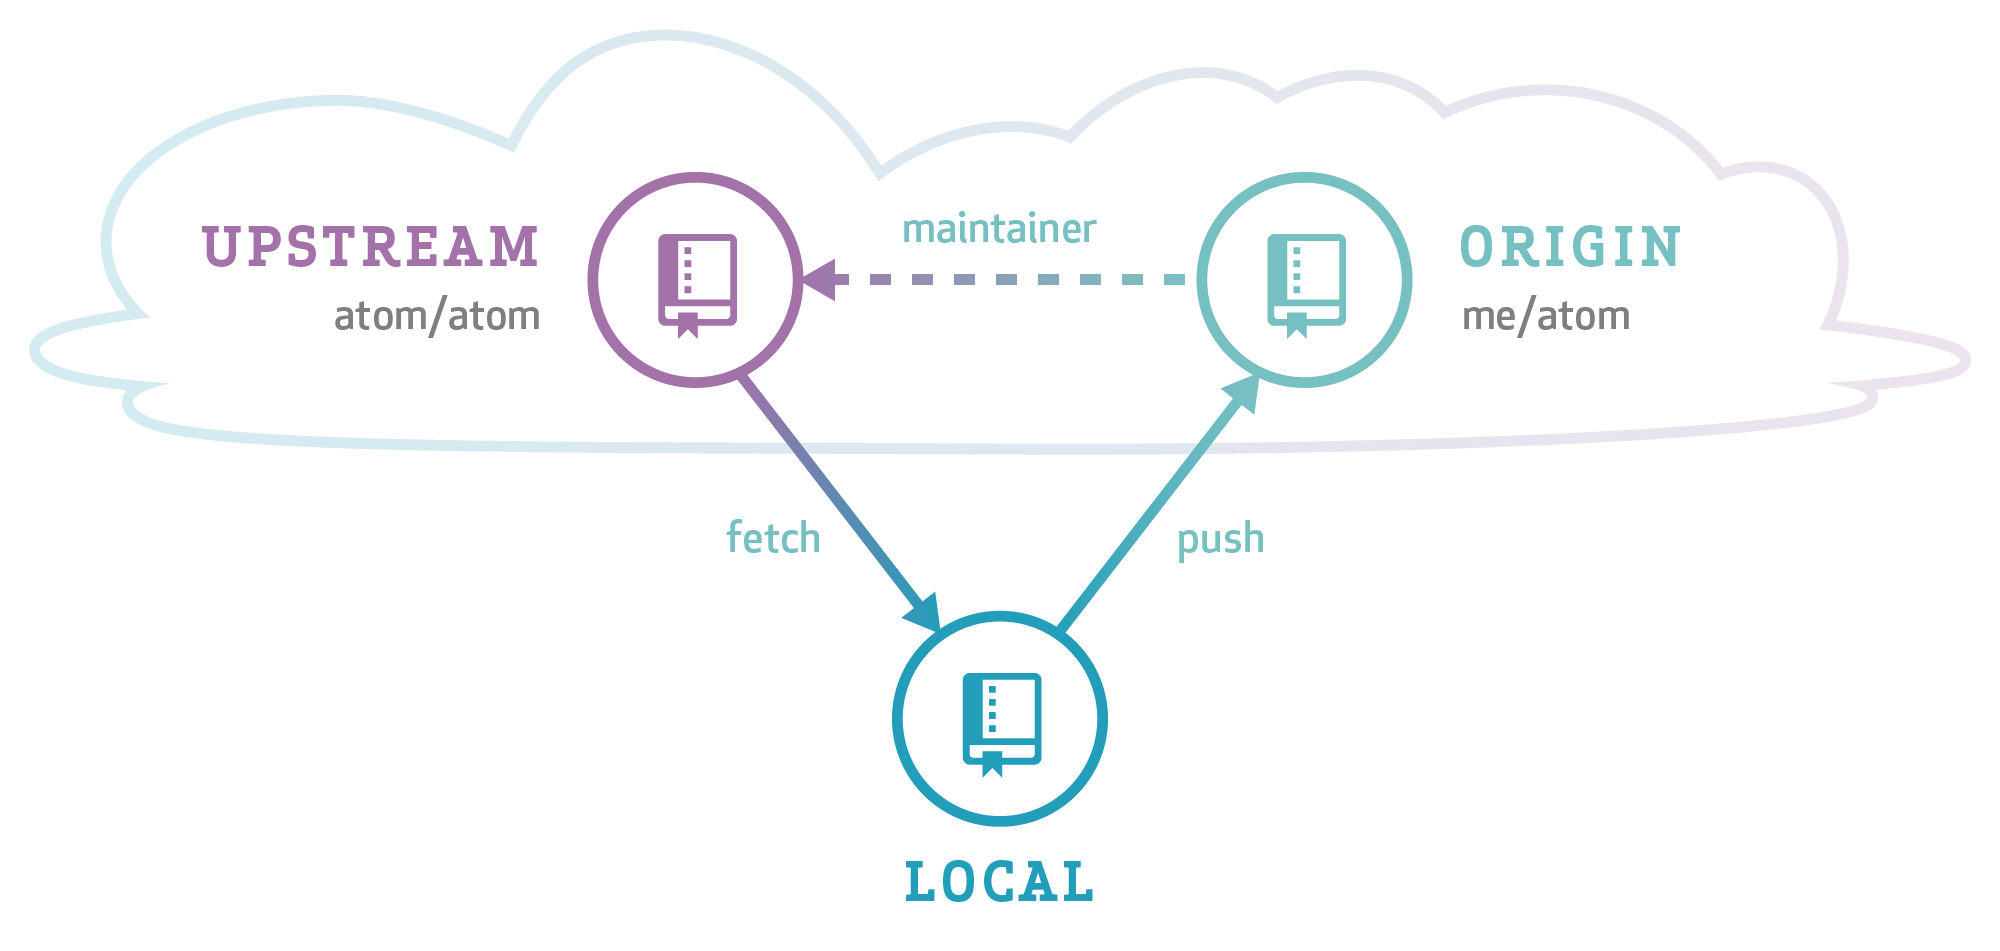
Our GitHub workflow is a so called triangular workflow:
The Vitess code is hosted on GitHub. This repository is called upstream. You develop and commit your changes in a clone of our upstream repository (shown as local in the image above). Then you push your changes to your forked repository (origin) and send us a pull request. Eventually, we will merge your pull request back into the upstream repository.
Remotes #
Since you should have cloned the repository from your fork, the origin remote
should look like this:
$ git remote -v
origin  git@github.com:<yourname>/vitess.git (fetch)
origin  git@github.com:<yourname>/vitess.git (push)
To help you keep your fork in sync with the main repo, add an upstream remote:
$ git remote add upstream git@github.com:vitessio/vitess.git
$ git remote -v
origin  git@github.com:<yourname>/vitess.git (fetch)
origin  git@github.com:<yourname>/vitess.git (push)
upstream        git@github.com:vitessio/vitess.git (fetch)
upstream        git@github.com:vitessio/vitess.git (push)
Now to sync your local main branch, do this:
$ git checkout main
(main) $ git pull upstream main
Note: In the example output above we prefixed the prompt with (main) to
stress the fact that the command must be run from the branch main.
You can omit the upstream main from the git pull command when you let your
main branch always track the main vitessio/vitess repository. To achieve
this, run this command once:
(main) $ git branch --set-upstream-to=upstream/main
Now the following command syncs your local main branch as well:
(main) $ git pull
Topic Branches #
Before you start working on changes, create a topic branch:
$ git checkout main
(main) $ git pull
(main) $ git checkout -b new-feature
(new-feature) $ # You are now in the new-feature branch.
Try to commit small pieces along the way as you finish them, with an explanation of the changes in the commit message. Please see the Code Review page for more guidance.
As you work in a package, you can run just
the unit tests for that package by running go test from within that package.
When you're ready to test the whole system, run the full test suite with make test from the root of the Git tree.
If you haven't installed all dependencies for make test, you can rely on the CI test results as well.
These results will be present on your pull request.
Committing your work #
When running git commit use the -s option to add a Signed-off-by line.
This is needed for the Developer Certificate of Origin.
Sending Pull Requests #
Push your branch to the repository (and set it to track with -u):
(new-feature) $ git push -u origin new-feature
You can omit origin and -u new-feature parameters from the git push
command with the following two Git configuration changes:
$ git config remote.pushdefault origin
$ git config push.default current
The first setting saves you from typing origin every time. And with the second
setting, Git assumes that the remote branch on the GitHub side will have the
same name as your local branch.
After this change, you can run git push without arguments:
(new-feature) $ git push
Then go to the repository page and it should prompt you to create a Pull Request from a branch you recently pushed. You can also choose a branch manually.
Addressing Changes #
If you need to make changes in response to the reviewer's comments, just make another commit on your branch and then push it again:
$ git checkout new-feature
(new-feature) $ git commit
(new-feature) $ git push
That is because a pull request always mirrors all commits from your topic branch which are not in the main branch.
Once your pull request is merged:
- close the GitHub issue (if it wasn't automatically closed)
- delete your local topic branch (
git branch -d new-feature)
Submitting Issues #
If you have a significant change to add, you need to create an issue prior to creating a Pull Request. This issue should be used to explain what you're planning to work on, to track progress, and design decisions.
Or if you'd like to report a bug you've found within Vitess you can also create an issue.
